![]()
This article covers the basics of Python:
- Syntax: variables and control-flow structures
- Collections: lists, tuples, sets, and dictionaries
- List comprehensions: a concise way of operating on collections
- Reusability: functions, classes and importing code
- Package management: using pip for installing libraries
- Running python scripts
To go through this tutorial, you need to have Python and Jupyter Notebook. The easiest way to get them is to use Anaconda.
Variables
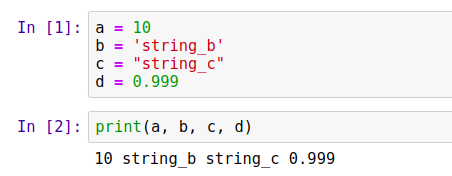
Python is a dynamic language — so you don’t need to declare types like in Java or C++. For example, to create a variable with integer or string, we only need to do a simple assignment:
a = 10 # a is an integer
b = 'string_b'
c = "string_c" # b and c are strings
d = 0.999 # d is a float
To print something to standard output, we can use the print function:
print(a, b, c, d)
It prints:
10 string_b string_c 0.999
To execute the code, you can put each code snippet in a cell of Jupyter Notebook and then execute it: press the “Run” button, or use “Shift+Enter” hotkey.
When we pass multiple arguments to print, like in the example above, it adds a space between each arguments when printing.
We can put multiple variables together with a special construction called tuple:
t = (a, b)
When we print t, we get the following:
(10, 'string_b')
To unwrap a tuple into multiple variables we use tuple assignment:
(c, d) = t
Now c and d contain the first value of the tuple and the second one, respectively:
print(c, d)
It prints:
10 string_b
We can drop the parentheses when using the tuple assignment:
c, d = t
This produces the same result.
Tuple assignment is quite useful and can make the code shorter. For example, we can use it to swap the content of two variables:
a = 10
b = 20
a, b = b, a # replace a with b and b with a
print("a =", a)
print("b =", b)
It will print
a = 20
b = 10
When printing, we can have nicely formatted strings using the “%” operator:
print("a = %s" % a) # replace "%s" with the content of a
print("b = %s" % b) # replace "%s" with the content of b
It will produce the same output:
a = 20
b = 10
Here %s is a placeholder: in this case, it means that we want to format the passed argument as a string. Other commonly used options are:
- “
%d” to format it as a number, - “
%f” to format it as a floating-point number.
We can pass in multiple arguments to the format operator in a tuple:
print("a = %s, b = %s" % (a, b))
The first occurrence of the placeholder %s will be replaced by a, and the second - by b, so it will produce the following:
a = 20, b = 10
Finally, if we have a floating-point number, we can use special formatting for it:
n = 0.0099999999
print("n = %.2f" % n)
This will round the float to the second decimal point when formatting the string, so we will see “0.01” when executing the code.
There are many options for formatting strings, and also other ways of formatting. For example, there’s also the so-called “new” way of formatting using the string.format method, which we won’t cover here. You can read more about these formatting options at https://pyformat.info or in the official documentation.
Control-flow
There are three control-flow statements in Python: “if”, “for” and “while”. Let’s take a look at each of them.
Conditions
A simple way to control the execution flow of a program is the “if” statement. In Python the syntax for “if” is the following:
a = 10

if a >= 5:
    print('the statement is true')
else:
    print('the statement is false')
This will print the first statement:
the statement is true
Note that in Python we use indentation for grouping the code after the “if” statement. We can chain multiple “if” statements together using “elif”, which is a shortening for “else-if”:
a = 3

if a >= 5:
    print('the first statement is true')
elif a >= 0:
    print('the second statement is true')
else:
    print('both statements are false')
This code will print the second statement:
the second statement is true
For loop
When we want to repeat the same piece of code multiple times, we use loops. The traditional “for” loop in Python looks like that:
for i in range(10):
    print(i)
This code will print numbers from 0 to 9, and 10 is not included:
0
1
2
3
4
5
6
7
8
9
When specifying the range we can set the starting number, the end number, and the increment step:
for i in range(10, 100, 5):
    print(i)
This code will print numbers from 10 to 100 (excluded) with step 5: 10, 15, 20, …, 95.
To exit the loop earlier, we can use the break statement:
for i in range(10):
    print(i)
    if i > 5:
        break
This code will print numbers between 0 and 6. When i is 6, it will break the loop, so it will not print any numbers after 6:
0
1
2
3
4
5
6
To skip an iteration of the loop, we use the continue statement:
for i in range(10):
    if i <= 5:
        continue
    print(i)
This code will skip the iterations when i is 5 or less, so it will print only numbers starting from 6:
6
7
8
9
While loop
The “while” loop is also available in Python. It executes while a certain condition is True. For example:
cnt = 0

while cnt <= 5:
    print(cnt)
    cnt = cnt + 1
In this code, we repeat the loop while the condition cnt <= 5 is True. Once this condition is no longer True, the execution stops. This code will print numbers between 0 and 5, including 5:
0
1
2
3
4
5
We can use the break and continue statements in while loops as well.
Collections
Collections are special containers that allow keeping multiple elements in them. We will look at four types of collections: lists, tuples, sets, and dictionaries.
Lists
A list is an ordered collection with the possibility to access an element by index. To create a list, we can simply put elements inside squared brackets:
numbers = [1, 2, 3, 5, 7, 11, 13]
To get an element by its index, we can use the brackets notation:
el = numbers[1]
print(el)
Indexing starts at 0 in Python, so when we ask for the element at index 1, we get “2”.
We can also change the values in the list:
numbers[1] = -2
To access the elements from the end, we can use negative indices. For example, “-1” will get the last element, “-2” - the one before the last and so on:
print(numbers[-1], numbers[-2])
As we expect, it prints “13 11”.
To add elements to the list, use the append function. It will append the element to the end of the list:
numbers.append(17)
To iterate over the elements of a list, we use a “for” loop:
for n in numbers:
    print(n)
When we execute it, we see all the elements printed:
1
-2
3
5
7
11
13
17
This is also known as a “for-each” loop in other languages: we execute the body of the loop for each element of the collection. It doesn’t include the indices, only the elements themselves. If we also need to have access to the index of each element, we can use range, as we did previously:
for i in range(len(numbers)):
    n = numbers[i]
    print("numbers[%d] = %d" % (i, n))
The function len returns the length of the list, so this code is roughly equivalent to the traditional way of traversing an array in C or Java and accessing each element by its index. When we execute it, the code prints the following:
numbers[0] = 1
numbers[1] = -2
numbers[2] = 3
numbers[3] = 5
numbers[4] = 7
numbers[5] = 11
numbers[6] = 13
numbers[7] = 17
A more “pythonic” (more common and idiomatic in the Python world) way of achieving the same thing is using the enumerate function:
for i, n in enumerate(numbers):
    print("numbers[%d] = %d" % (i, n))
In this code, the i variable will get the index, and the n variable - the respective element from the list. This code will produce the exact same output as the previous loop.
To concatenate multiple lists into one, we can use the plus operator. For example, consider two lists:
list1 = [1, 2, 3, 5]
list2 = [7, 11, 13, 17]
We can create a third list that contains all the elements from list1 followed by the elements from list2 by concatenating the two lists:
new_list = list1 + list2
This will produce the following list:
[1, 2, 3, 5, 7, 11, 13, 17]
Finally, it’s also possible to create a list of lists: a list whose elements are lists as well. To show that, let’s first create three lists with numbers:
list1 = [1, 2, 3, 5]
list2 = [7, 11, 13, 17]
list3 = [19, 23, 27, 29]
Now let’s put them together in another list:
lists = [list1, list2, list3]
Now lists is a list of lists. When we iterate over it with a for loop, at each iteration we get a list:
for l in lists:
    print(l)
This will produce the following output:
[1, 2, 3, 5]
[7, 11, 13, 17]
[19, 23, 27, 29]
Slicing
Another useful concept in Python is slicing – it’s used for getting a part of the list. For example, let’s consider the list of numbers again:
numbers = [1, 2, 3, 5, 7]
If we want to select a sublist with the first three elements, we can use the colon operator (“:”) for specifying the range for selection:
top3 = numbers[0:3]
In this case, “0:3” means “select elements starting from index 0 till index 3 (exclusive)”. The result contains the first three elements: [1, 2, 3]. Note that it selects elements at the indices 0, 1 and 2, so 3 is not included.
If we want to include the beginning of the list, we don’t need to specify the first number in the range:
top3 = numbers[:3]
If we don’t specify the second number in the range, we get everything till the end of the list:
last3 = numbers[2:]
The list last3 will contain the last three elements: [3, 5, 7] .

Tuples
We already met tuples previously in the Variables section. Tuples are also collections, they are quite similar to lists. The only difference is that they are immutable: once you create a tuple, you cannot change the content of the tuple.
To create a tuple we use parentheses:
numbers = (1, 2, 3, 5, 7, 11, 13)
Like with lists, we can get the value by index:
el = numbers[1]
print(el)
However, we cannot update the values in the tuple. When we try to do it, we get an error:
numbers[1] = -2
If we try to execute this code, we get
---------------------------------------------------------------------------
TypeError                                 Traceback (most recent call last)
<ipython-input-15-9166360b9018> in <module>
----> 1 numbers[1] = -2

TypeError: 'tuple' object does not support item assignment
Likewise, we cannot append a new element to the tuple. However, we can use concatenation to achieve the same result:
numbers = numbers + (17,)
Here we create a new tuple that contains the old numbers and we concatenate it with another tuple that contains only one number: 17. Note that we need to add a comma to make a tuple, otherwise Python will treat it as a simple number.
Effectively, the expression above is the same as writing
numbers = (1, 2, 3, 5, 7, 11, 13) + (17,)
After doing it, we get a new tuple that contains a new element, so when printing it, we get
(1, 2, 3, 5, 7, 11, 13, 17)
Set
Another useful collection is set: it’s an unordered collection that keeps only unique elements. Unlike lists, it cannot contain duplicates and it’s also not possible to access an individual element of a set by index.
To create a set, we use curly braces:
numbers = {1, 2, 3, 5, 7, 11, 13}
Note: To create an empty set, we need to use
set:empty_set = set()Simply putting empty curly braces will create a dictionary – a collection that we cover later in this appendix:
empty_dict = {}
Sets are faster than lists for checking if the collection contains an element. We use the “in” operator for checking it:
print(1 in numbers)
Since “1” is in the numbers set, this line of code will print True.
To add an element to the set, we use the add method:
numbers.add(17)
To iterate over all the elements of the set we again use a for loop:
for n in numbers:
    print(n)
When we execute it, it prints
1
2
3
5
7
11
13
17
Dictionaries
Dictionary is another extremely useful collection in Python: we use it to build a key-value map. To create a dictionary, we use curly braces, and to separate the keys and values we use colons (“:”):
words_to_numbers = {
    'one': 1,
    'two': 2,
    'three': 3,
}
To retrieve the value by the key, we use brackets:
print(words_to_numbers['one'])
If something is not in the dictionary, Python raises an exception:
print(words_to_numbers['five'])
When we try to execute it, we get the following error:
---------------------------------------------------------------------------
KeyError                                  Traceback (most recent call last)
<ipython-input-38-66a309b8feb5> in <module>
----> 1 print(words_to_numbers['five'])

KeyError: 'five'
To avoid it, we can first check if the key is in the dictionary before attempting to get the value. We can use the “in” statement for checking it:
if 'five' in words_to_numbers:
    print(words_to_numbers['five'])
else:
    print('not in the dictionary')
When running this code, we’ll see “not in the dictionary” in the output.
Another option is to use the get method. It doesn’t raise an exception, but returns None if the key is not present in the dictionary:
value = words_to_numbers.get('five')
print(value)
It will print “None”. When using get, we can specify the default value in case the key is not present in the dictionary:
value = words_to_numbers.get('five', -1)
print(value)
In this situation, we’ll get “-1”.
To iterate over all the keys of a dictionary, we use a for loop over the results from the keys method:
for k in words_to_numbers.keys():
    v = words_to_numbers[k]
    print("%s: %d" % (k, v))
It will print:
one: 1
two: 2
three: 3
Alternatively, we can directly iterate over the key-value pairs in the dictionary using the items method:
for k, v in words_to_numbers.items():
    print("%s: %d" % (k, v))
It produces exactly the same output as the previous code.
List comprehension
List comprehension is a special syntax for creating and filtering lists in Python. Let’s again consider a list with numbers:
numbers = [1, 2, 3, 5, 7]
Suppose we want to create another list where all the elements of the original list are squared. For that we can use a for loop:
squared = []

for n in numbers:
    s = n * n
    squared.append(s)
We can concisely rewrite this code into one single line using list comprehension:
squared = [n * n for n in numbers]
It’s also possible to add an if condition inside to process only the elements that meet the condition:
squared = [n * n for n in numbers if n > 3]
It translates to the following code:
squared = []

for n in numbers:
    if n > 3:
        s = n * n
        squared.append(s)
If all we need is to apply the filter and leave the elements as is, we can do that as well:
filtered = [n for n in numbers if n > 3]
This translates to
filtered = []

for n in numbers:
    if n > 3:
        filtered.append(n)
It’s also possible to use list comprehension for creating other collections with a slightly different syntax. For example, for dictionaries we put curly braces around the expression and use a colon to separate keys with values:
result = {k: v * 10 for (k, v) in words_to_numbers.items() if v % 2 == 0}
This is a shortcut for the following code:
result = {}

for (k, v) in words_to_numbers.items():
    if v % 2 == 0:
        result[k] = v * 10
Warning: When learning about list comprehension it might be tempting to start using it everywhere. Typically it fits best for simple cases, but for more complex situations, for loops should be preferred over list comprehension for better code readability.
If in doubt, use “for” loops.
Code reusability
At some point, when we write a lot of code, we need to think about how to organize it better. We can achieve that by putting small reusable pieces of code inside functions or classes. Let’s take a look at how to do it.
Functions
To create a function we use the def keyword:
def function_name(arg1, arg2):
    # body of the function
    return 0
When we want to exit the function and return some value, we use the return statement. If we simply put return without any value or don’t include return in the body of the function, the function will return None.
For example, we can write a function that prints values from 0 up to a specified number:
def print_numbers(max): #A
    for i in range(max + 1): #B
        print(i)

#A create a function with one argument: "max"
#B use the "max" argument inside the function
To call this function, simply add the arguments in parentheses after the name:
print_numbers(10)
It’s also possible to provide the names of the arguments when invoking the function:
print_numbers(max=10)
Classes
Classes provide higher-level abstraction than functions: they can have an internal state and methods that operate on this state. Let’s consider a class NumberPrinter that does the same thing as the function from the previous section: it prints numbers.
class NumberPrinter:

    def __init__(self, max): #A
        self.max = max #B

    def print_numbers(self): #C
        for i in range(self.max + 1): #D
            print(i)

#A the class initializer
#B assign the max argument to the "max" field
#C method of the class
#D use the internal state when invoking the method
In this code, __init__ is the initializer: it runs whenever we want to create an instance of a class:
num_printer = NumberPrinter(max=10)
Note that inside the class the __init__ method has two arguments: self and max. The first argument of all the methods always has to be self: this way we can use self inside the method to access the state of the object.
However, when we invoke the method later, we don’t pass anything the self argument: it’s hidden from us. So, when we invoke the print_number method on the instance of the NumberPrinter object, we simply put empty parentheses with no parameters:
num_printer.print_numbers()
This code produces the same output as the function from the previous section.
Importing code
Now suppose we want to put some code to a separate file. Let’s create a file called useful_code.py and place it in the same folder as the notebook.
Inside the file, we can put the function and the class we just created: this way, we create a module with the name “useful_code”. To access the function and the class inside the module, we import them using the import statement:
import useful_code
Once it’s imported, we can use it:
num_printer = useful_code.NumberPrinter(max=10)
num_printer.print_numbers()
It’s also possible to import a module and give it a short name: e.g. if instead of writing “useful_code” we want to write “uc”, we can do
import useful_code as uc

num_printer = uc.NumberPrinter(max=10)
num_printer.print_numbers()
This is a very common idiom in scientific Python: packages like NumPy and Pandas are typically imported with shorter aliases:
import numpy as np
import pandas as pd
Finally, if we don’t want to import everything from the module, we can choose what exactly to import using “from ... import” syntax:
from useful_code import NumberPrinter

num_printer = NumberPrinter(max=10)
num_printer.print_numbers()
Installing libraries
It’s possible to put our code into packages that are available for everyone. For example, NumPy or Pandas are such packages. They are already available in the Anaconda distribution, but typically they don’t come pre-installed with Python.
To install such external packages, we can use the built-in package installer called “pip”. We use the command line and specify the packages we want to install:
pip install numpy scipy pandas
It’s also possible to specify the version of each package when installing:
pip install numpy==1.16.5 scipy==1.3.1 pandas==0.25.1
When we already have a package, but it’s outdated and we want to update it, we need to run pip install with the -U flag:
pip install -U numpy
Finally, if we want to remove a package, we use pip uninstall
pip uninstall numpy
Python programs
To execute Python code, we can simply call the Python interpreter and specify the file we want to execute. For example, to run the code inside our “useful_code.py” script, execute the following command in the command line:
python useful_code.py
When we execute it, nothing happens: we only declare a function and a class there and don’t actually use them. To see some results, we need to add a few lines of code to the file. For example, we can add the following:
num_printer = NumberPrinter(max=10)
num_printer.print_numbers()
Now when we execute this file, we see the numbers that NumberPrinter prints.
However, when we import a module, internally Python executes everything inside the module. It means that the next time we do “import useful_code” in the notebook, we’ll see the numbers printed there.
To avoid it, we can tell the Python interpreter that some code needs to run only when executed as a script - and not imported. To achieve that, we put our code inside the following construction:
if __name__ == "__main__":
    num_printer = NumberPrinter(max=10)
    num_printer.print_numbers()
Finally, we can also pass arguments when running python scripts
import sys

# declarations of print_numbers and NumberPrinter

if __name__ == "__main__":
    max_number = int(sys.argv[1]) #A
    num_printer = NumberPrinter(max=max_number) #B
    num_printer.print_numbers()

#A parse the parameter as an integer: by default, it's a string
#B pass the parsed argument to the NumberPrinter instance
Now we can run the script with custom parameters:
python useful_code.py 5
As a result, we’ll see numbers from 0 to 5:
0
1
2
3
4
5
Summary
- Python is a dynamically typed language, so we don’t need to specify types when declaring variables.
- Conditions (if statements) and loops (for and while loops) are used to control the execution flow of Python programs.
- Lists and tuples are ordered collections: we can access the elements by index. However, tuples, unlike lists, are immutable: we cannot modify the elements inside the tuple.
- Set is an unordered collection that doesn’t contain duplicate elements. We use sets when we need to quickly check if an element is contained in a collection.
- We use dictionaries when we need to map keys to values.
- List comprehension lets us concisely create and filter lists and other collections.
- To achieve code reusability, put the code in functions and classes. We can also organize the code in modules and import only the pieces we need.
- To install a Python package, we can use pip, which is a package manager for Python.