We’ll cover:
- Configuring a domain for serving models
- Creating an EKS cluster
- Installing KFServing (without the entire Kubeflow)
- Serving the model
- Code: https://github.com/alexeygrigorev/kubeflow-deep-learning
Prerequisites:
- Your own domain (maybe it’s possible to do it without a custom domain, but I don’t know. Let me know if you find a way to do it)
- AWS cli
- Kubectl and eksctl installed (see Creating an EKS Cluster for instructions)
Clone the Repo
We’ll need some files from this repo:
git clone git@github.com:alexeygrigorev/kubeflow-deep-learning.git
Create a EKS cluster
We’ll use eksctl for creating a cluster. More info.
Create a config file (cluster.yaml):
apiVersion: eksctl.io/v1alpha5
kind: ClusterConfig

metadata:
  name: ml-bookcamp-eks
  region: eu-west-1
  version: "1.18"

nodeGroups:
  - name: ng
    desiredCapacity: 2
    instanceType: m5.xlarge
Apply it:
eksctl create cluster -f cluster.yaml
It takes a while — up to 20 minutes. In the meantime, you can do the next steps (configuring a subdomain and certificate manager)
It should create a cluster and put the config to ~/.kube/config. If
there’s an error and it doesn’t create the config file, create it with
AWS cli:
aws eks --region eu-west-1 update-kubeconfig --name ml-bookcamp-eks
Verify that you can connect to the cluster:
kubectl get service
It should return the list of services currently running on a cluster:
NAME         TYPE        CLUSTER-IP   EXTERNAL-IP   PORT(S)   AGE
kubernetes   ClusterIP   10.100.0.1   <none>        443/TCP   6m17s
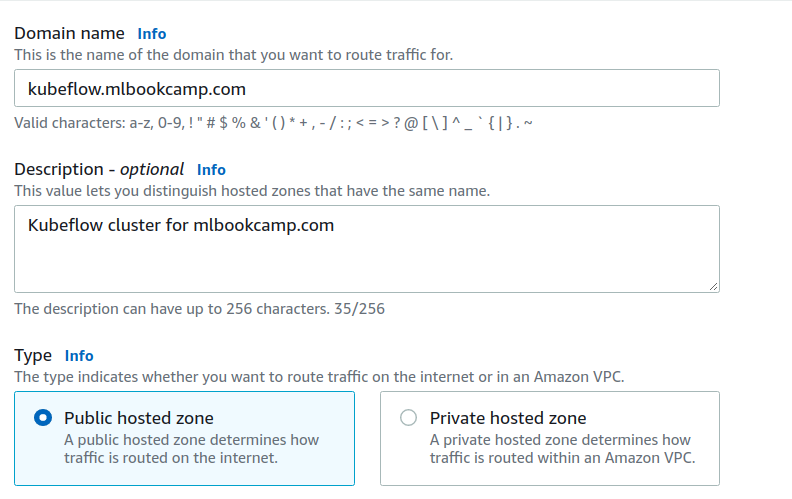
Configuring a subdomain
Go to “Route 53”, create a hosted zone. Put any subdomain there. For example, “kubeflow.mlbookcamp.com”:
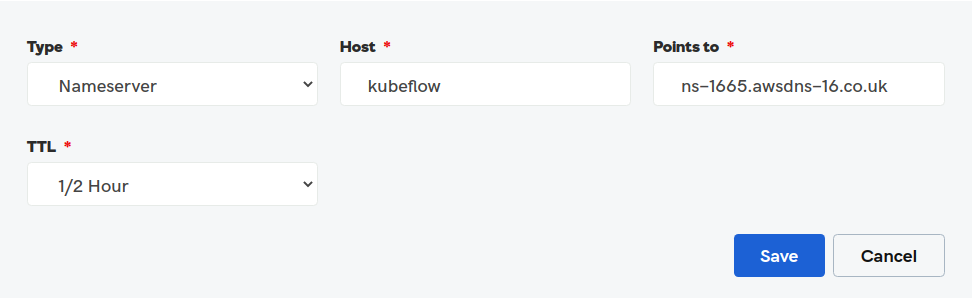
When it’s created, note the NS record:

Here they are:
ns-1665.awsdns-16.co.uk.ns-1115.awsdns-11.org.ns-913.awsdns-50.net.ns-192.awsdns-24.com.
Now configure it in your domain provider. Go to DNS settings of your domain provider (e.g. GoDaddy). Create a new NS (Namespace) record for each:
Configuring Certificate Manager
To access the endpoint with http, you’ll need to create a certificate.
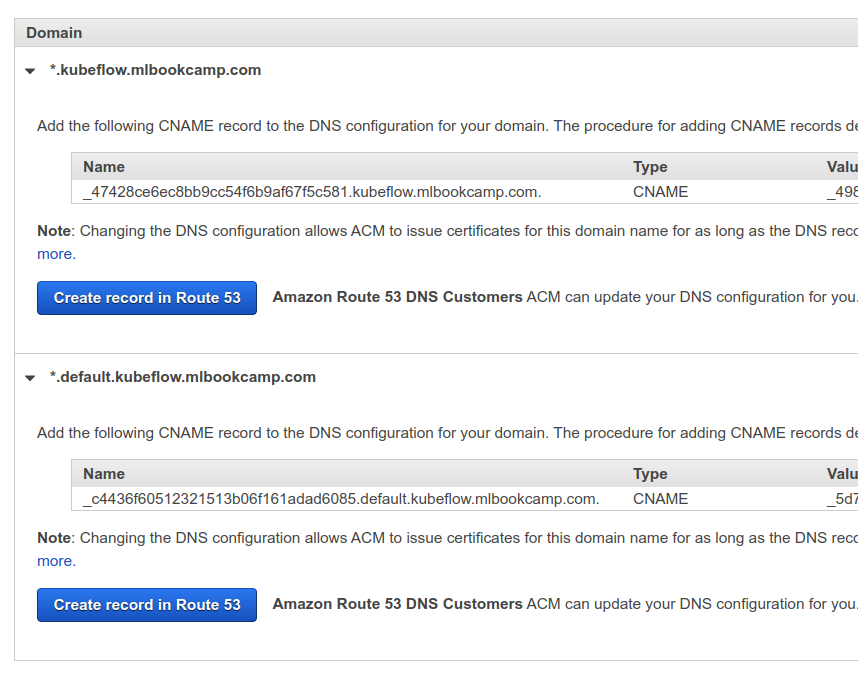
Go to Certificate Manager and select “Provision certificates”. Choose “Request a public certificate”, click “request a certificate”. Choose the “DNS validation method”.
Click “request” and then, in the next step, click on the domain name, and then click “Create record in Route 53”.
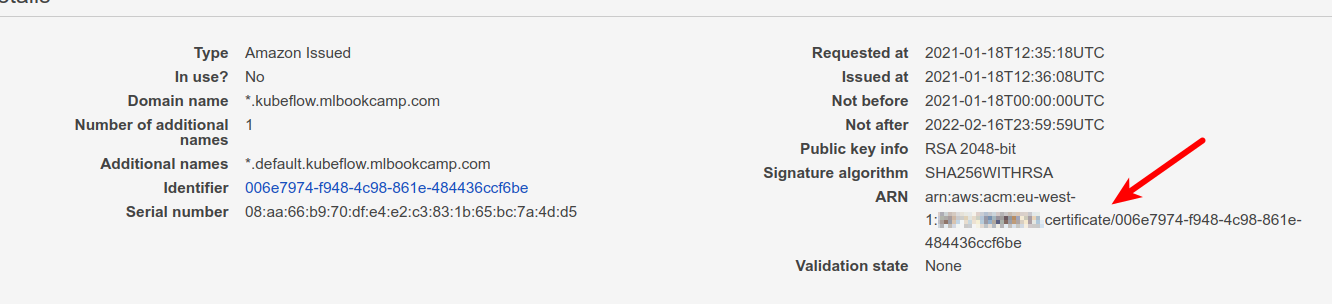
Validating the certificate should be fast (1-2 minutes), but may take more time (up to 30 minutes).
Take a note of the certificate’s ARN. We’ll need it for the next step.
Install KFServing
We’ll use the quick install script. It will install
- Istio
- KNative Serving
- Cert manager
- KFServing
Go to the install directory. First, rename
istio-operator-template.yaml to istio-operator.yaml
Find the line with
"service.beta.kubernetes.io/aws-load-balancer-ssl-cert" and use your
certificate ARN from the previous step.
Run the installation script:
./install.sh
Next, we need it to use our domain. Create a config file for it
(config-domain.yaml):
apiVersion: v1
kind: ConfigMap
metadata:
  name: config-domain
  namespace: knative-serving
data:
  kubeflow.mlbookcamp.com: ""
Apply it:
kubectl apply -f config-domain.yaml
Check that it installed correctly:
kubectl get pod -n kfserving-system
You should see:
NAME                             READY   STATUS    RESTARTS   AGE
kfserving-controller-manager-0   2/2     Running   0          107s
Configure Route53
The previous step installed Istio. It created a load balancer. We’ll now need the domain we created previously to point to that ELB.
Go to EC2, select “Load Balancers’’, find the load balancer created by Istio. If you have multiple load balancers, look for the one with tag “tag:kubernetes.io/cluster/ml-bookcamp-eks : owned”
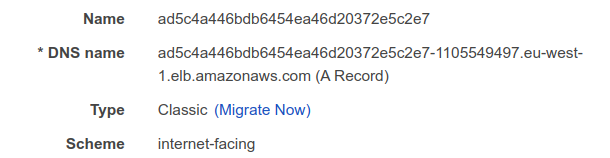
Copy its DNS name.
Then go to Route53, select the hosted zone we created previously and create a new CNAME record:
- Record name:
*(asterisk) - Record type:
CNAME - Value: the DNS name of the load balancer

Now this domain can be used by KF-Serving.
Deploying a test model to KFServing
This step is optional. Feel free to jump to the next section.
Let’s deploy a simple model. Create a config (“tf-flowers.yaml” - we copied it from KFServing repo) with this content:
apiVersion: "serving.kubeflow.org/v1alpha2"
kind: "InferenceService"
metadata:
  name: "flowers-sample"
spec:
  default:
    predictor:
      tensorflow:
        storageUri: "gs://kfserving-samples/models/tensorflow/flowers"
Apply it:
kubectl apply -f tf-flowers.yaml
Check that it works:
kubectl get inferenceservice
The output:
NAME             URL                                                                              READY   DEFAULT TRAFFIC   CANARY TRAFFIC   AGE
flowers-sample   http://flowers-sample.default.kubeflow.mlbookcamp.com/v1/models/flowers-sample   True    100                                45m
Test it with curl:
MODEL="flowers-sample"
DOMAIN="kubeflow.mlbookcamp.com"

curl -X POST \
    -H 'Content-Type: application/json' \
    -d @flowers-input.json \
    https://${MODEL}.default.${DOMAIN}/v1/models/${MODEL}:predict
The output:
{
    "predictions": [
        {
            "prediction": 0,
            "key": "   1",
            "scores": [0.999114931, 9.20989623e-05, 0.000136786737, 0.000337258854, 0.000300533458, 1.84814289e-05]
        }
    ]
}
It works! We can delete this model:
kubectl delete -f tf-flowers.yaml
Let’s now deploy our own model.
Configure KF-Serving to use S3
We will save our model to S3, so KFServing will need to be able to access it to fetch the model files. We need to do it by providing credentials. (Not sure if it can use a role, if it can, please let me know and I’ll update the tutorial).
The credentials need to be encoded with base64. Let’s do it:
echo -ne ${AWS_ACCESS_KEY_ID} | base64
echo -ne ${AWS_ACCESS_KEY_ID} | base64
Now create a config with secrets (kfserving-s3-secret.yaml). Change
the region if you need:
apiVersion: v1
kind: Secret
metadata:
  name: mysecret
  annotations:
    serving.kubeflow.org/s3-endpoint: s3.eu-west-1.amazonaws.com
    serving.kubeflow.org/s3-usehttps: "1"
    serving.kubeflow.org/s3-verifyssl: "1"
    serving.kubeflow.org/s3-region: eu-west-1
type: Opaque
data:
  # put your encoded key and secret here
  awsAccessKeyID: QUtJQVhxxxVXVjQ=
  awsSecretAccessKey: QzR0UnxxxVNOd0NQQQ==
---
apiVersion: v1
kind: ServiceAccount
metadata:
  name: sa
secrets:
  - name: s3credentials
Apply it:
kubectl apply -f kfserving-s3-secret.yaml
Now KF-serving will be able to fetch models from S3
By the way, this is how the config for the test flowers model looks like when the models are in S3:
apiVersion: "serving.kubeflow.org/v1alpha2"
kind: "InferenceService"
metadata:
  name: "flowers-sample"
spec:
  default:
    predictor:
      serviceAccountName: sa
      tensorflow:
        storageUri: "s3://mlbookcamp-models/flowers"
We add serviceAccountName and change the storageUri to use s3.
That’s all! Now you can use a KFServing cluster on EKS for deploying models!